It’s relatively simple to call custom actions with Web API, and it’s also relatively simple to display an error that may occur in the custom action. You just need to know how to do it.
Here is how you can do it with JQuery:
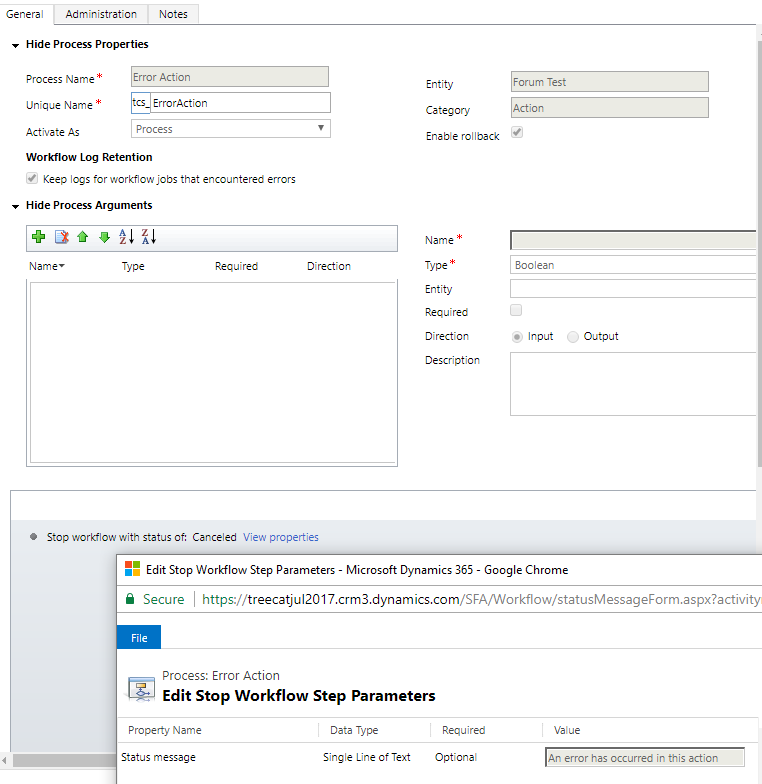
1. Create an action and add “stop workflow” step with an error message
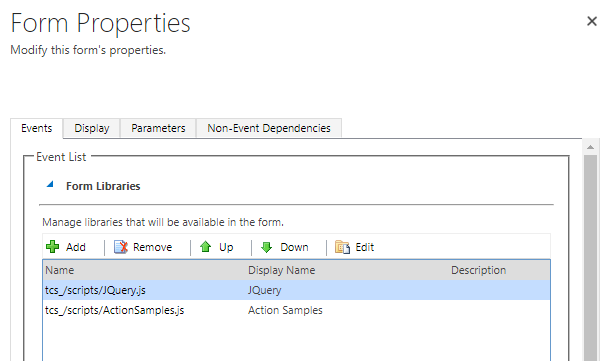
2. Create a web resource for jQuery
You can download JQuery source code from here: https://jquery.com/download/
3. Add a web resource for your own javascript code
function RunErrorWorkflow()
{
  CallAction("tcs_testentities(" + Xrm.Page.data.entity.getId().replace('{', '').replace('}', '') + ")/Microsoft.Dynamics.CRM.tcs_ErrorAction");
}

function CallAction(actionUrl, jsonData)
{
  actionUrl = Xrm.Page.context.getClientUrl()+"/api/data/v8.2/"+actionUrl;
  $.ajax({
          url: actionUrl,
          async: false,
          type: "POST",
          data: jsonData,
          dataType: "json",
          beforeSend: function(x) {
            if (x && x.overrideMimeType) {
              x.overrideMimeType("application/j-son;charset=UTF-8");
            }
          },
          success: function(result) {
 	     alert(result);
          },
          error: function(err)
          {
             var result = JSON.parse(err.responseText);
             alert(result.error.message);
          }
   });
}
You will need to modify RunErrorWorkflow function so it would be using correct entity name and correct action name.
A couple of notes:
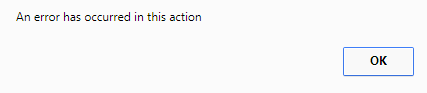
- Notice an alert there. That’s where the error will be displayed
- That’s implemented as a synchronous call to make sure it waits for the custom action to complete
4. Add both of those web resources to the form
5. Finally, make a call to RunErrorWorkflow somewhere. I have configured an event handler below:
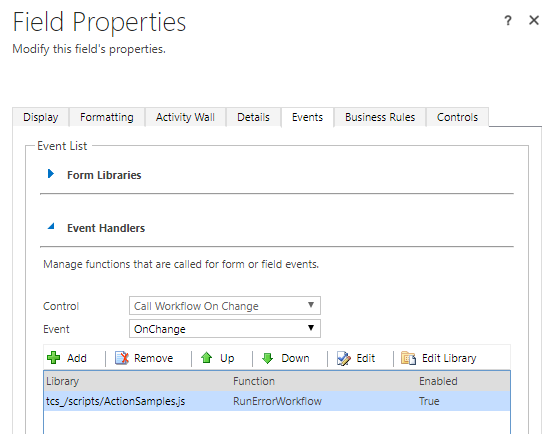
Save, publish all, reopen the browser, click F5 to refresh everything.. Make sure that event handler above gets called. You should see a javascript popup alert:
That’s it. If you want to change the message, just go back to the custom action, deactivate it, update properties of the “stop workflow” step, and activate the action again.